Converts a PFX formatted certificate into PEM format
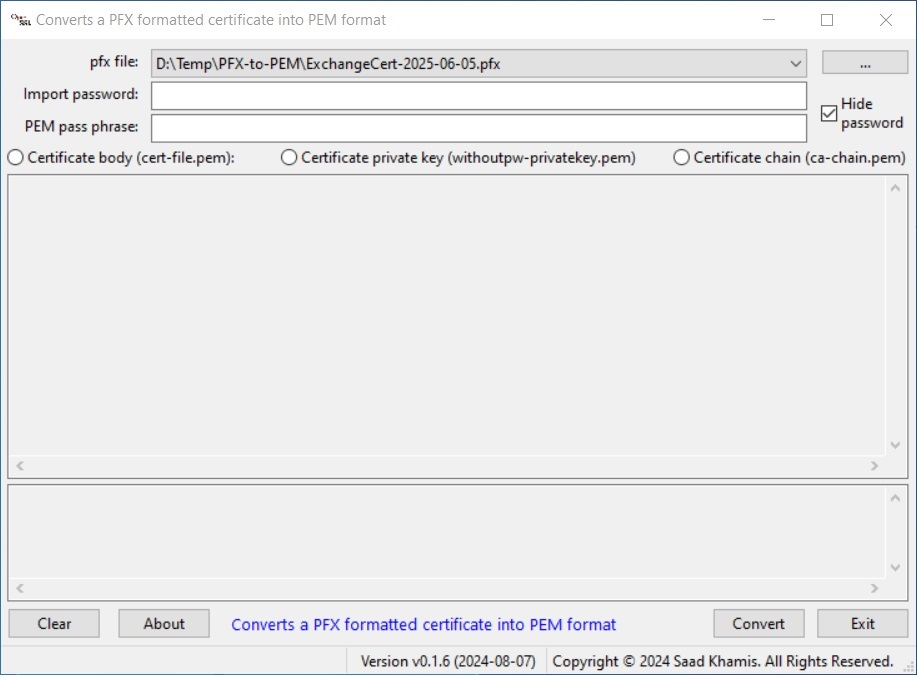
In this blog, I will provide a tool called PX-to-PEM that converts PFX formatted certificates into PEM format. The tool features a simple and user-friendly GUI.
Note: PFX-to-PEM.exe is developed using the AutoIt Scripting Language. When you download PFX-to-PEM.exe, your antivirus software might flag it as a virus. However, this is a false positive, as the file does not contain any malicious code.
| Download | MD5 |
|---|---|
| PFX-to-PEM | 156d94b255cb8cb9f556b07e59cce3f1 |
Introduction
There are plenty of articles and blogs explaining how to perform the conversion, but I created this utility for the convenience of myself and others.
This utility follows the steps outlined in How to import PFX-formatted certificates into AWS Certificate Manager using OpenSSL.
The utility converts a PFX-encoded signed certificate into three separate PEM-formatted files, which are then stored in the same folder as the original PFX file.
- Certificate body – cert-file.pem – PEM file containing the SSL/TLS certificate for the resource.
- Certificate private key – withoutpw-privatekey.pem – PEM file containing the private key of the certificate with no password protection.
- Certificate chain – ca-chain.pem – PEM file containing the root certificate of the CA.
Prerequisites
- Download and install the OpenSSL toolkit. Use the file available from Shining Light Productions.
- Add the OpenSSL binaries location to your system PATH variable, so that the binaries are available for command line use.
- Download PFX-to-PEM utility.
Convert a PFX formatted certificate into PEM format
- Start PFX-to-PEM utility.
- Click the three-dot button and select a PFX file. Previously selected files are saved in the registry for future use.
- Enter the PFX import password.
- Enter the PEM pass phrase.
- Click on convert.
- The status window, bottom, will show OpenSSL executed commands and results.
- The PEM files window, middle, will show the content of each file.
- Click on the file radio button to view the corresponding file.

PFX-to-PEM other features
- Hide password: Hide or show Import password and PEM pass phrase.
- Clear: Clears the status window.
- About: Shows the utility’s About window, which provides details on the resources used to build the utility, including the PowerShell commands utilized.
- The utility settings are stored in the registry when exiting and loaded upon startup, Computer\HKEY_CURRENT_USER\SOFTWARE\PFX-to-PEM.
Conclusion
I utilized OpenSSL to write a provide a tool called PX-to-PEM that converts PFX formatted certificates into PEM format. The tool features a simple and user-friendly GUI.
Did you find this blog easy to follow and helpful? I would love to hear your feedback and suggestions. Please let me know in the comments below.
Disclaimer
Purpose of the code contained in blog is solely for learning and demo purposes. Author will not be held responsible for any failure or damages caused due to any other usage.

There's no comments